


Someone asked what cool things you can do with the Hashnode API, so I'll show you the first thing I did right after I migrated to Hashnode.
I'm trying to make a habit out of posting one article every day, so I created a recurrent task in Todoist for this. However, I like to automate things, so instead of manually checking that task every day, how about I do this:
- each time I post an article, the recurrent task completes itself(it will appear again tomorrow)
- Alexa will congratulate me for posting the article in the Echo Dot from my office
How can I do all of this? With Home Assistant of course, because that's the place where I integrate my smart home with most of my online tools. I'm going to use Node-Red for this, so I have to find a way to refresh the latest article and trigger an event when it changes. Here are the steps to make this happen:
- I'll make a request to the Hashnode API every 30 minutes and save the id of the last posted article in a Home Assistant variable
- When the variable changes an event will be triggered to which I'll subscribe using Node-Red. Once the event fires, I'll complete the Todoist task and I'll ask Alexa to congratulate me for the new article
Making GraphQL requests from Node-Red
In order to make requests to the Hashnode API we need to use GraphQL. Fortunately for us, Node-Red has a node for this called "graphql", so make sure you have it installed before going further. Next, we're going to add the node to our flow and configure it to make a request towards Hashnode. I'll be using this GraphQL query to retrieve the ids of my latest articles, so even if I update a title I will know it's the same article because I'm storing the id, which won't change.
And here's how the node is configured in the UI.
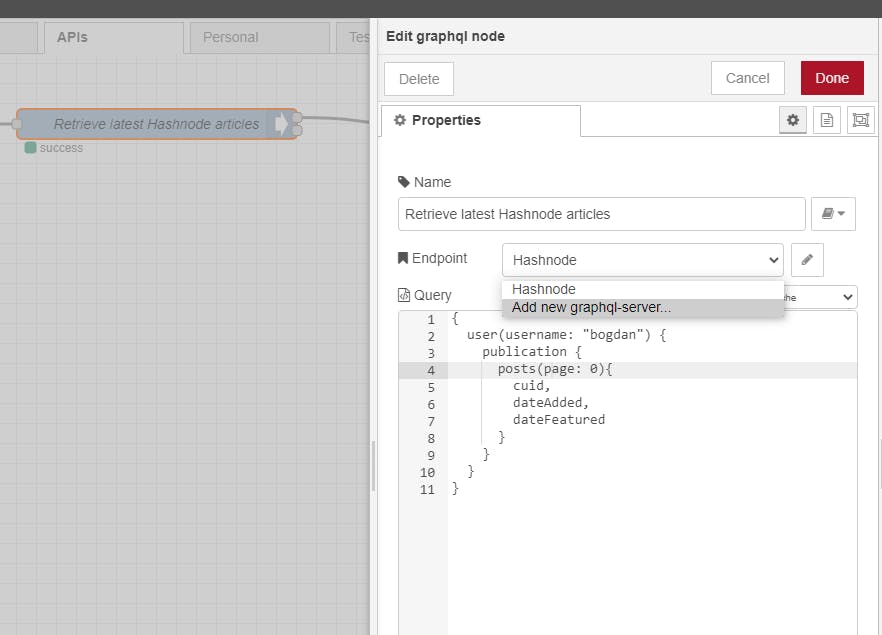
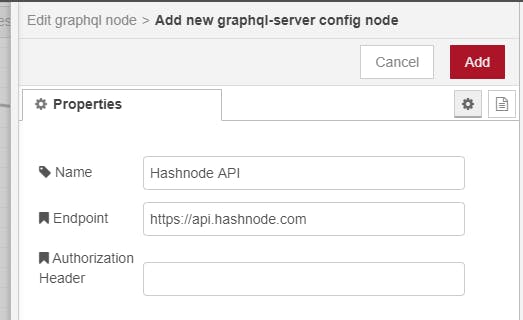
As you can see, there's a dropdown where you can define the server. Click on the edit button and set the address of the Hashnode API, which is https://api.hashnode.com
Now let's run this and see what we get. I'll add an inject node before the GraphQL request and a debug node at the end so we can see what response we have from Hashnode.
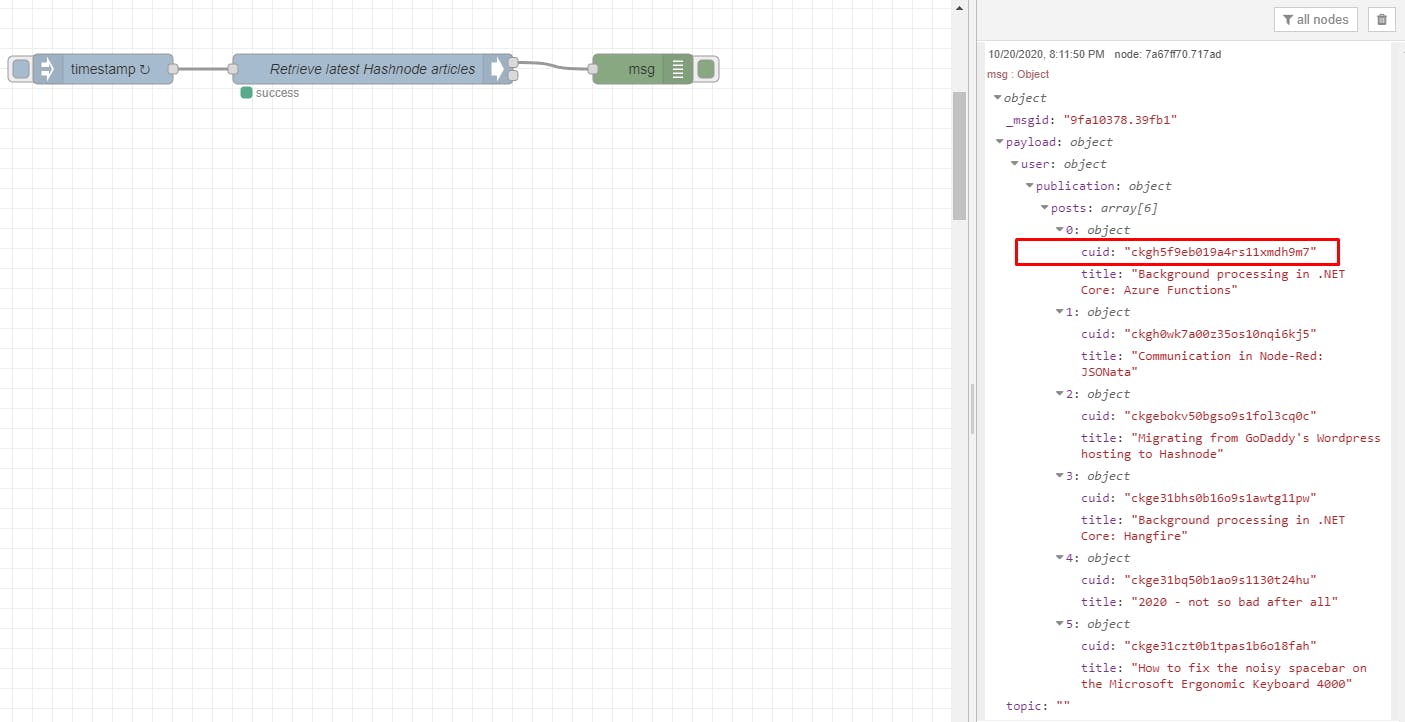
As you can see, I have the latest articles returned with their title and id because these are the only fields I requested. For my scenario I need the first one because that is the latest article. Now I am going to use a HACS component called "home-assistant-variables". Go ahead and install this, because we're going to save the id in a variable.
Once you have it installed, you're going to have to define a variable in your configuration.
This is how I defined my variable:
Now you'll have to restart Home Assistant before going further. Go on... I'll wait!
We'll use Node-Red to set its value with the response we get from Hashnode. To do this, grab a "call service" node from Node-Red and configure it like this:
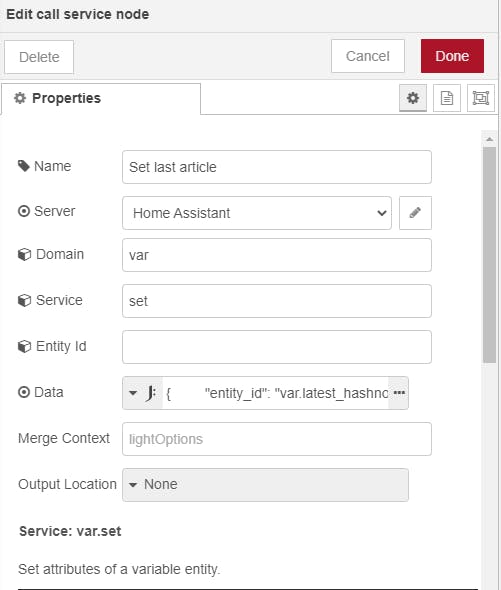
Select JSONata on the data field, and add this:
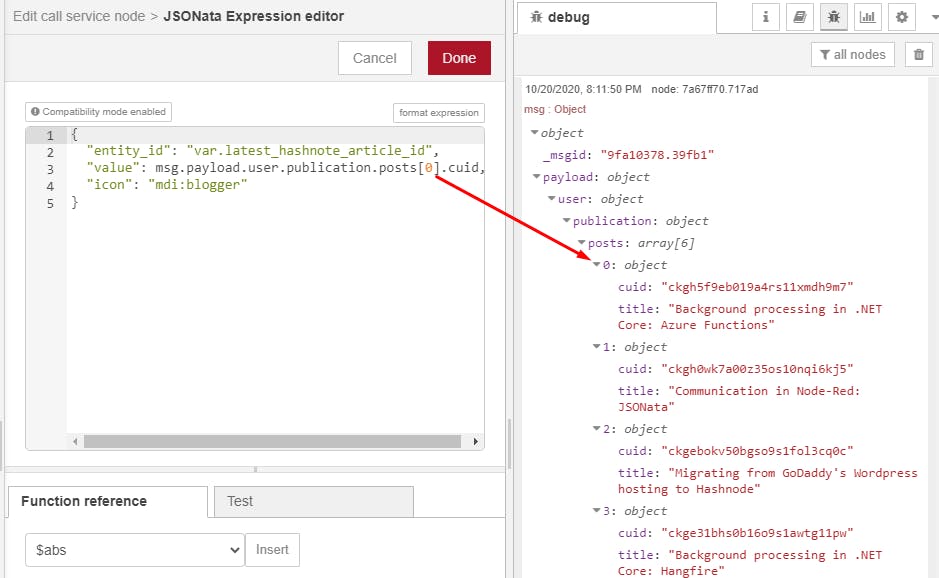
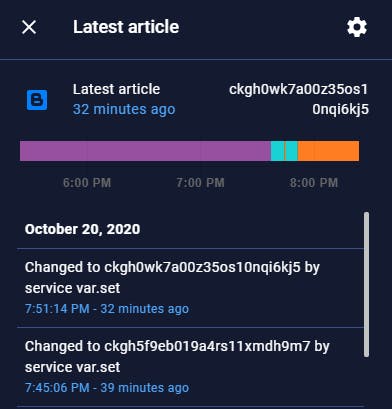
Now you can deploy and run the flow. Once we get a response, the variable should have the value of the latest article.
Congratulations, if you got here it means the first part is ready.
Alexa integration
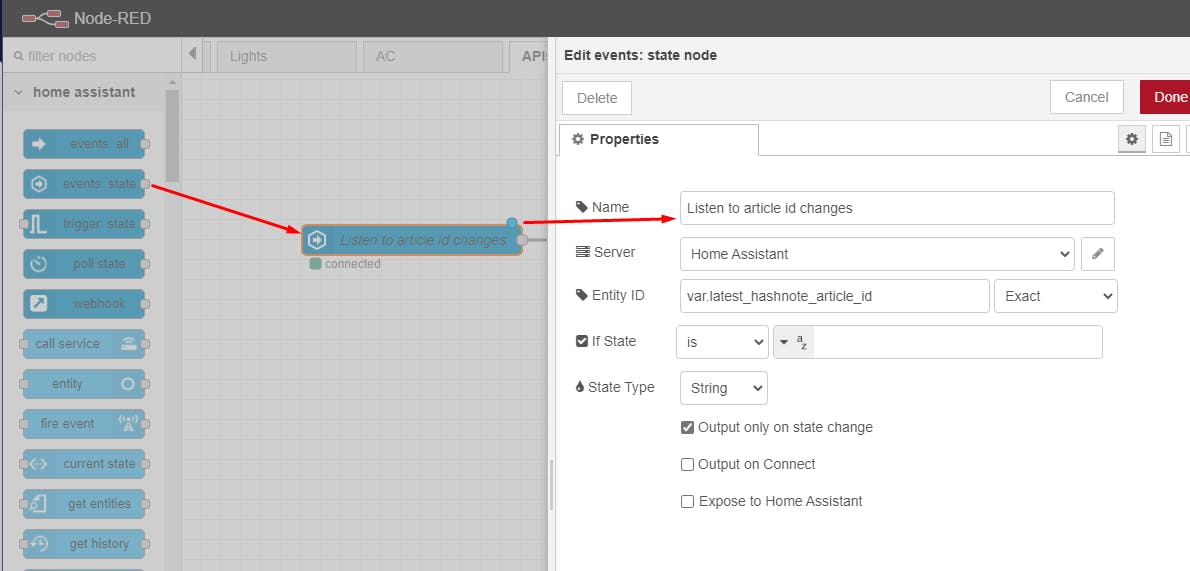
Now that we have our variable updated every time a new article is posted, this means we can listen to state changes using Node-Red. Grab a "events: state" node and configure it like this:
The next part is a bit tricky, especially if you don't have Alexa configured in Home Assistant. I won't cover this here because it would make this blog post too long and the documentation from the Alexa Media Player component is good enough to get you started.
In order to make things easier for myself, I created a subflow for Alexa which handles a lot of stuff, from deciding what Echo Dot device to use, to setting the volume or canceling notifications if it knows we're asleep. I use this subflow like this:
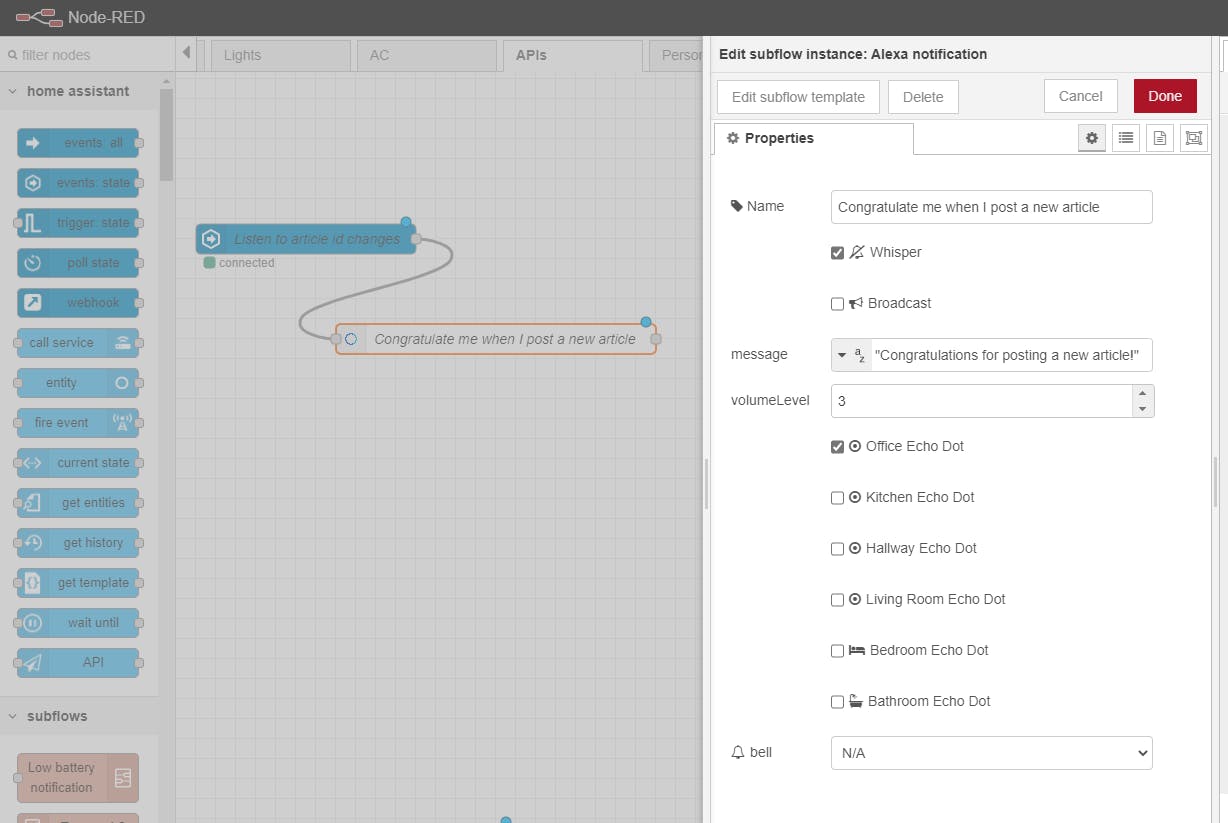
As you can see, I can set the message, which device to play this on, what volume to use, if it should whisper or broadcast, etc. I even have sounds so I could ring an alarm if an article is featured for example... or if someone breaks into the house :)
That's it for the Alexa configuration. At the end of the article I'll show you a live demo of this! Now let's see how we can update a Todoist task from Node-Red!
Working with the Todoist API from Node-Red
Todoist has a REST API that we can use to update a task. Basically, we'll do a POST request with our access token on a specific endpoint, and we'll need the id of the task we want to update.
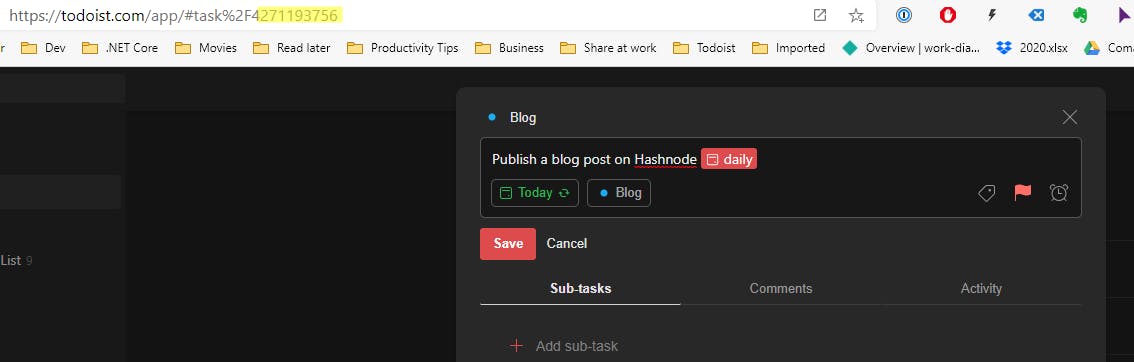
The easiest way to get the ID of the task is from the URL if you use the web app. Once we have this, we'll use it in Node-Red and make a request to Todoist.
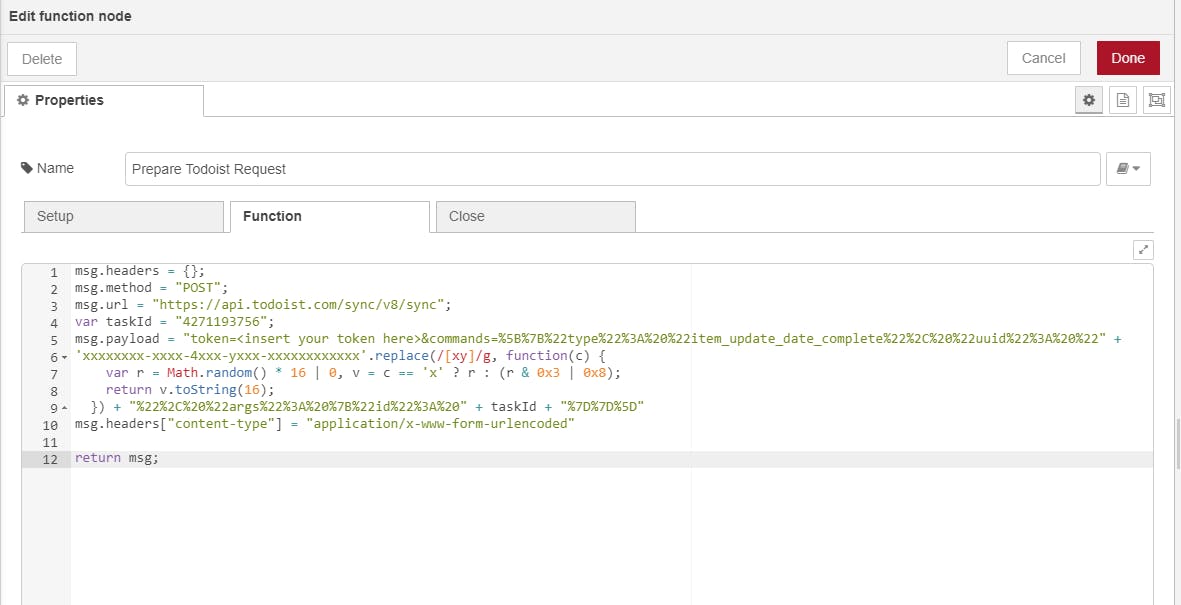
First we need a function to define the payload for Todoist. In here we'll encode a JSON that has the task id, the Todoist token for authentication and a random UID. The easiest thing to do would be to copy this and replace the task id and the token.
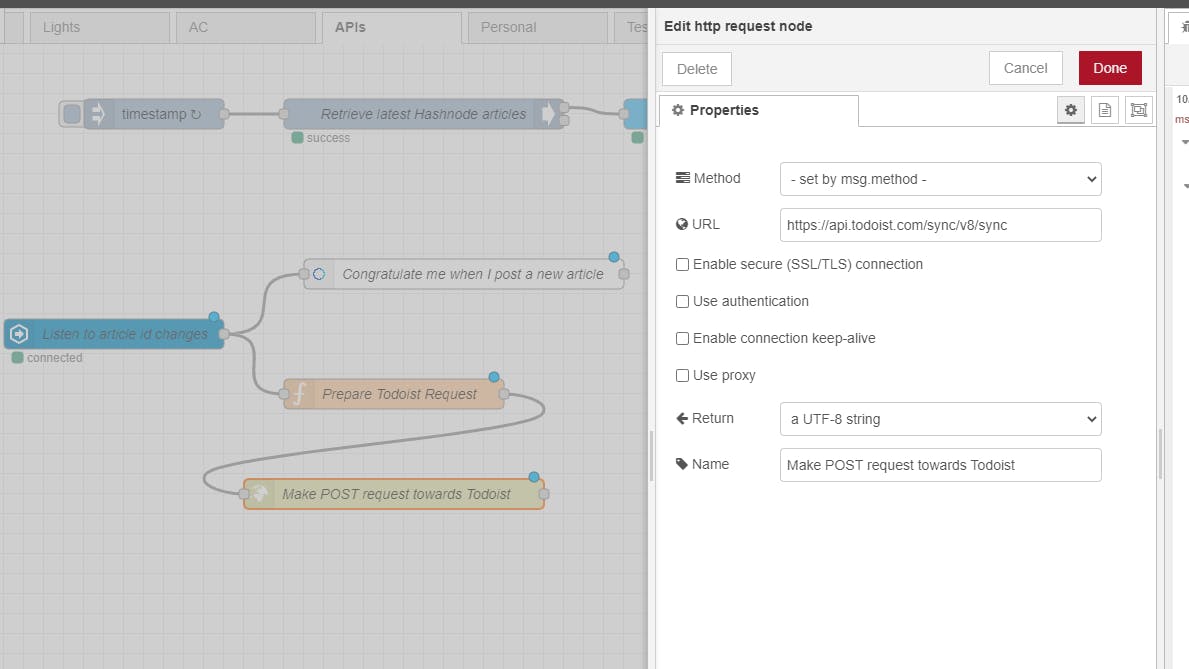
Now we'll add an HTTP request node where we configure the Todoist API URL. The method and the body of the request are taken from the payload sent from the function. Here's how it should look like:
Now, I'll post this article and record what happens with Alexa and the Todoist task. If everything goes well, I'll check every 5 seconds and my event should fire when the article is posted. Wish me luck :)
EDIT: It worked :)