


In my opinion, one of the most useful features that Node-Red has to offer is the ability to create subflows. According to the official documentation , subflows are:
a collection of nodes that are collapsed into a single node in the workspace.
I won't bore you with the documentation, instead I'll give you a simple example that you can try without having to install anything besides Node-Red and Home Assistant. The goal is for you to be able to follow this article and create your own subflow and understand where and why it's useful.
Scenario: Sending notifications to your phone from Node-Red
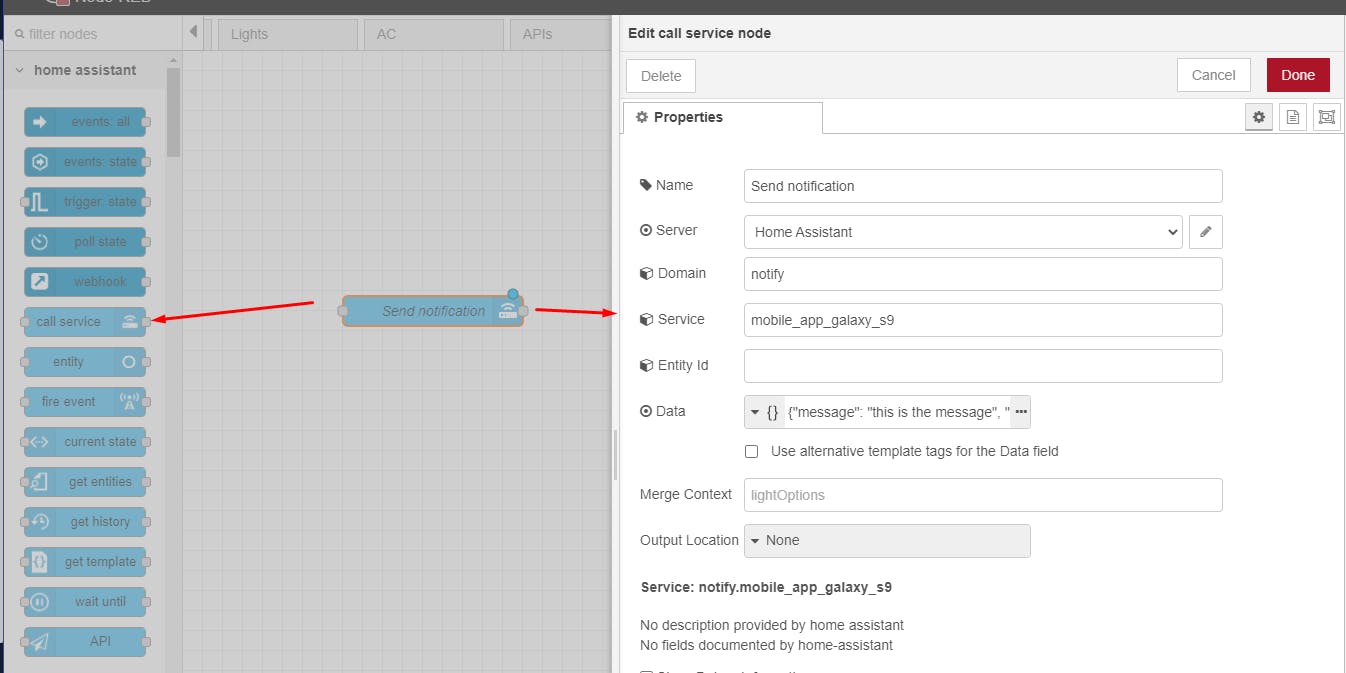
Let's say that you want to send notifications from Node-Red to your phone using the "notify" service. The easiest way to do this would be to use the "call service" node like this:
Now, if you want to send a notification, you can use this node like this wherever you want:
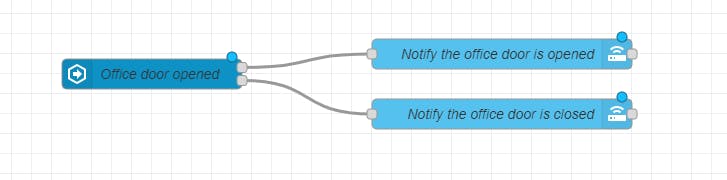
Here, I duplicated my node and I just changed the message. In one node I send the message "The office door is opened", and in the other one I send the message "The office door is closed".
For this scenario, this is enough, you can just duplicate the node and change the message, but things are not always that simple.
For example, let's say that you don't want to send notifications between 10 PM and 8 AM. An easy way to implement this requirement would be like this:
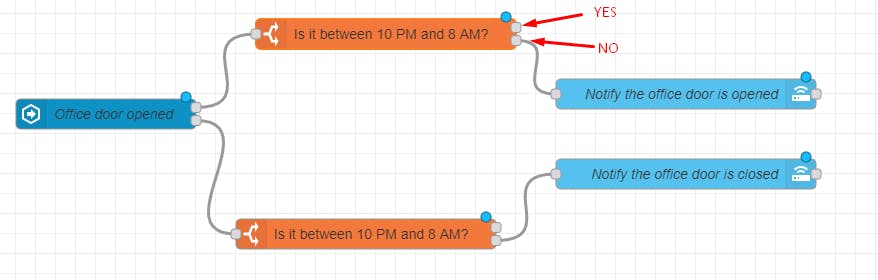
I used the "time range" node to check if the current time is between 10 PM and 8 AM, and if it's not, then I'll allow the notification to be sent.
Then one day you're in a meeting and your phone starts ringing from a notification, so you realize that it's not enough to turn it off during the night, you need a setting that could be turned on/off during the day. In this case we can use an input_boolean in our Home Assistant dashboard which will block all notifications from being sent when it's turned off. To implement this, we have to add another node, and because we're sending two notifications, it's two nodes that have to be added.
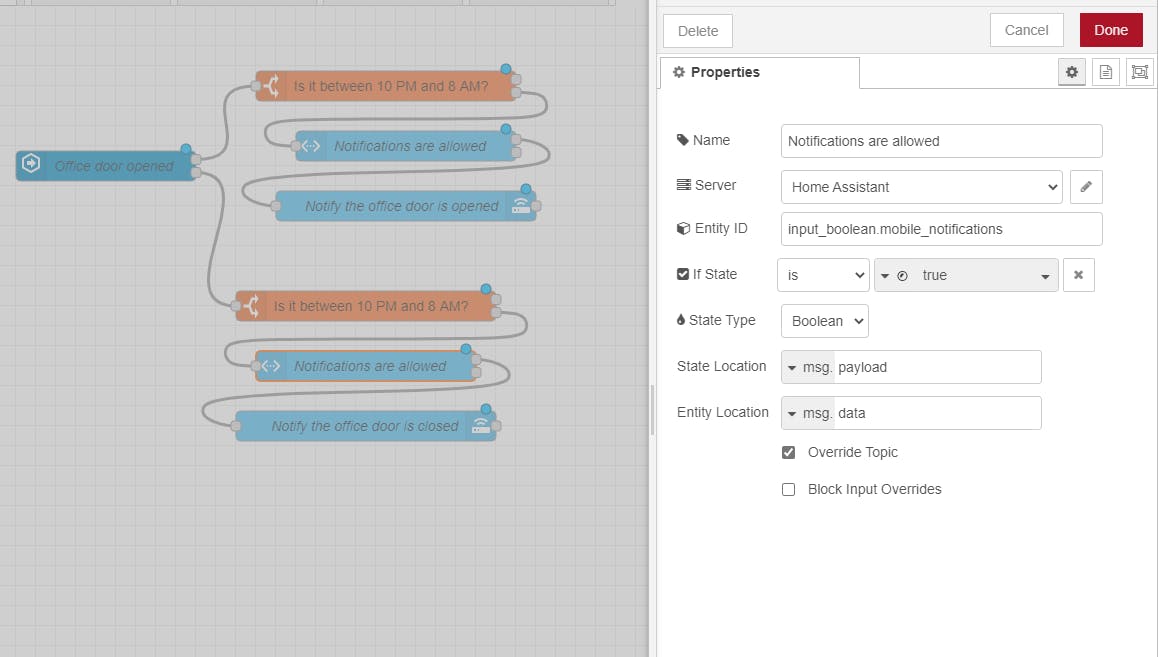
This is starting to look ugly, and imagine if you had to do this for many other places as well, it's a nightmare. If you're a programmer, then principles like "DRY"(Don't Repeat Yourself) are starting to pop into your head, and indeed, this is just like "code" duplication. Once you have a new idea or you find an issue, you'll have to go everywhere you have a notification and either add another node or apply the same fix. But how do we fix this?
Subflows
I'm going to create a subflow with these nodes so I can reuse them in other places. Here's how you can do that:
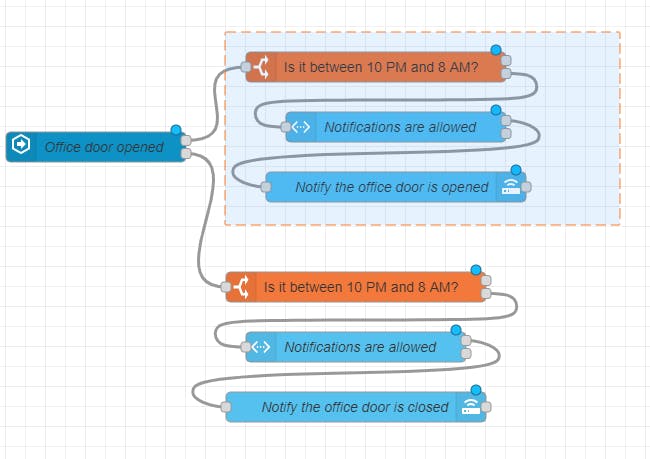
First, select the 3 nodes from the first notification:
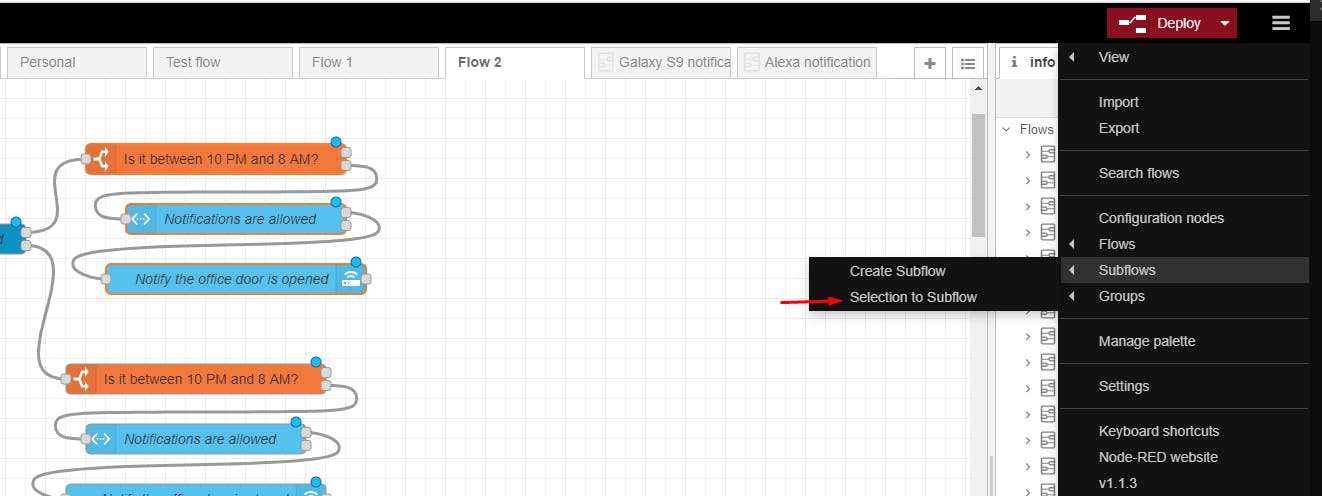
Now open the menu from the right, and choose "Subflows" -> "Selection to subflow".
You should now see something like this:
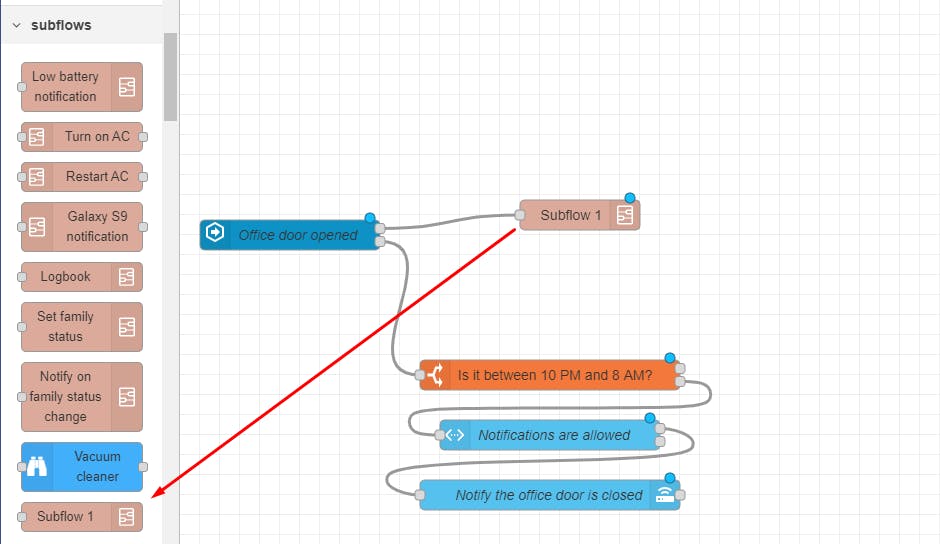
This means that a new subflow was created with the name "Subflow 1", and every time you want to use it you can drag it from the "subflows" sections in the left part.
However, we're not done yet. Indeed, you can reuse it everywhere but now you just have a subflow that will send a notification with the message "The office door is opened" between 8 AM and 10 PM. If we really want to make this right then we'll have to add "parameters" so that we can specify what message and title to be sent.
Using environment variables
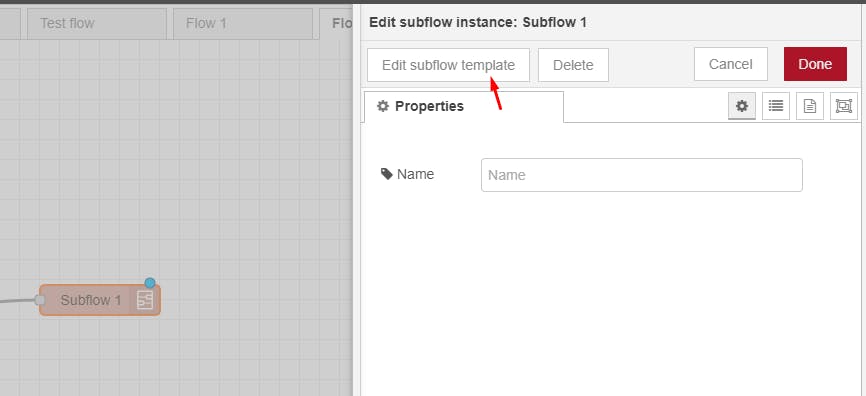
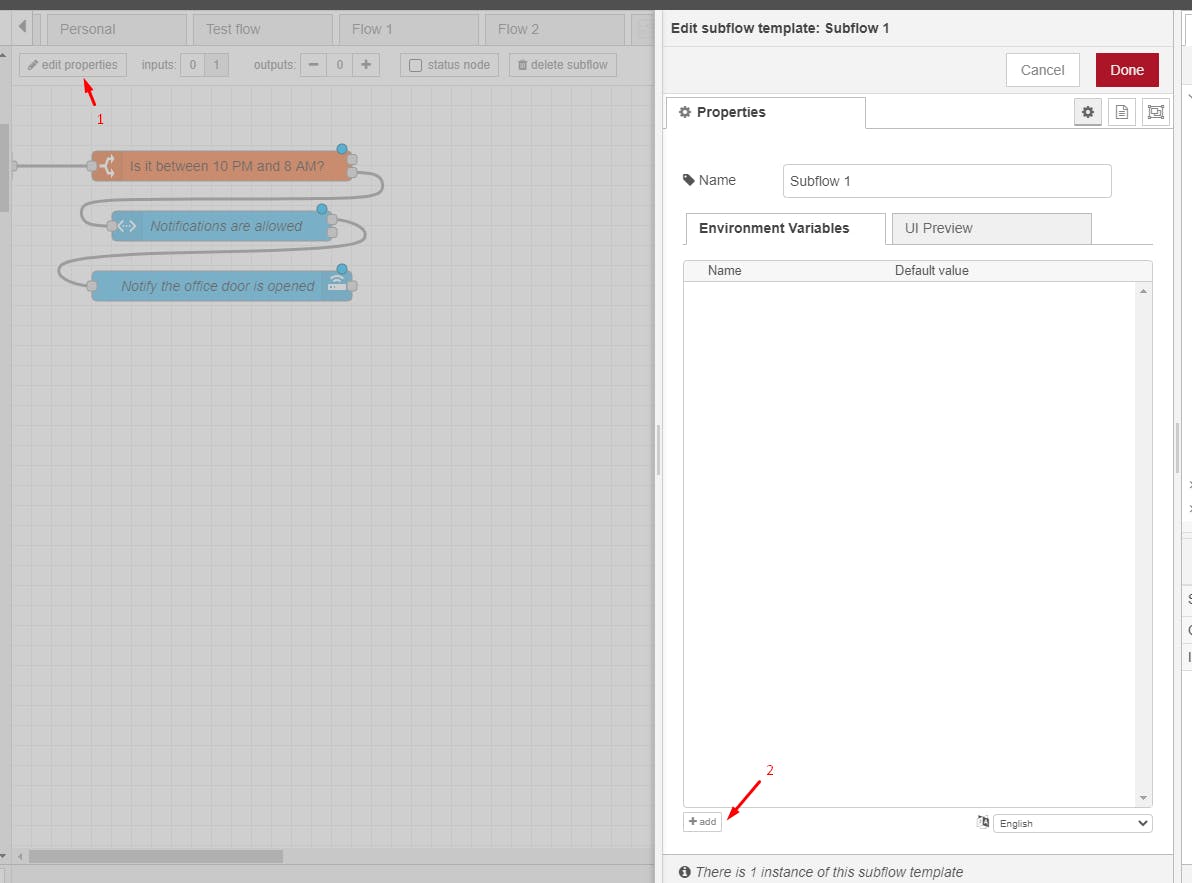
Let's open our subflow by double clicking it, and then we'll click on "Edit subflow template". You'll be taken to the subflow template where you can see the 3 nodes we had earlier:
Now click on "edit properties", and then click on the "add" button:
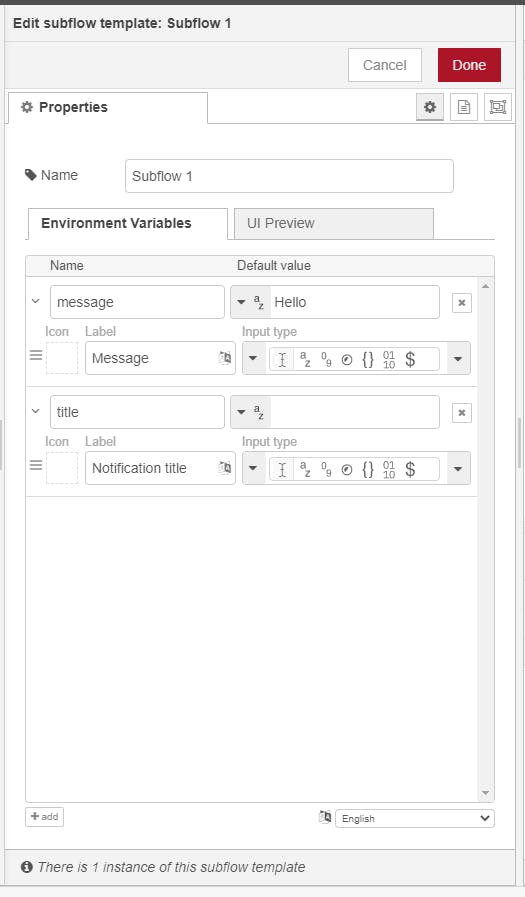
You just added an environment variable. You can set a name for it that we'll use to reference it later, and you can also add a default value. In my example, I added a variable called "message" with the label "Message" and the default value "Hello".
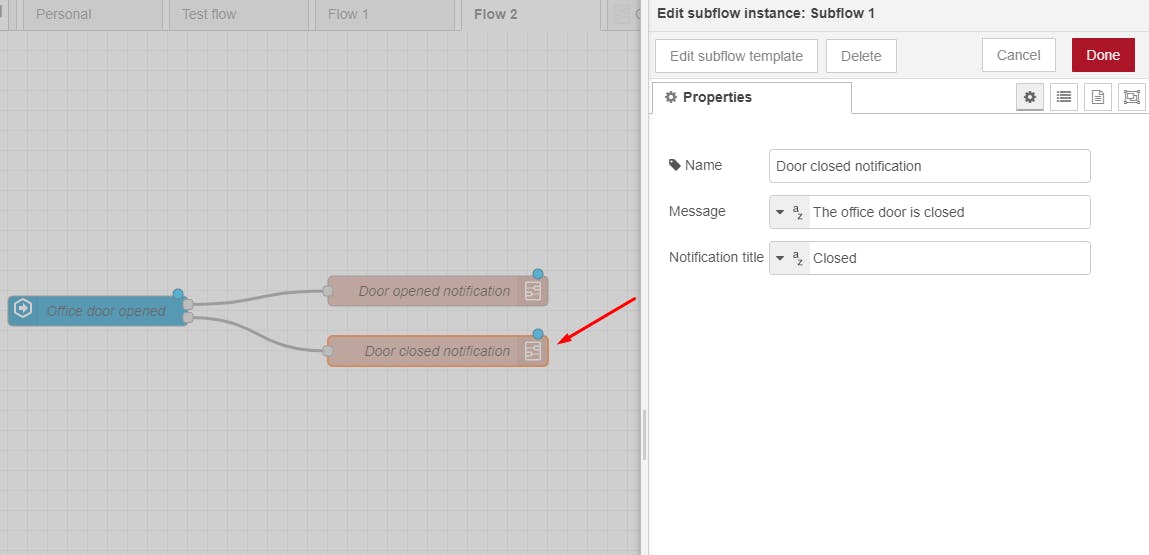
Once you add these two, just click on Done and get back to our flow. Once you're there, double click on the subflow node again.
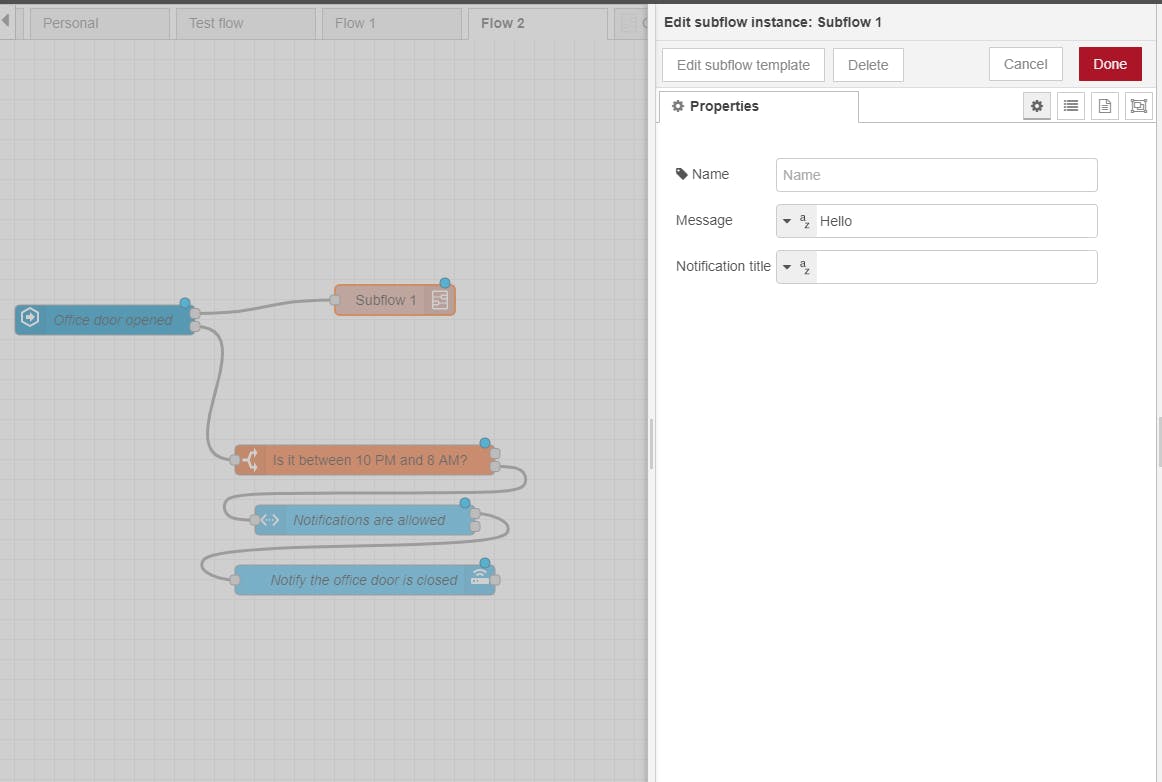
You should see the variables like in the image above. The "message" variable has the label "Message", and the default value "Hello". You can change this one with the message "The office door is opened", and set whatever title you want. We'll now delete the 3 nodes from the other branch of the sensor and put our subflow instead.
Now there's one more thing we have to do in order to use the values we set in the variables. Inside our subflow we have the notification node, but this node still uses the message "The office door is opened", so instead of using a hardcoded message we'll tell it to use whatever value we have in our "message" variable, and we'll apply the same for the "title".
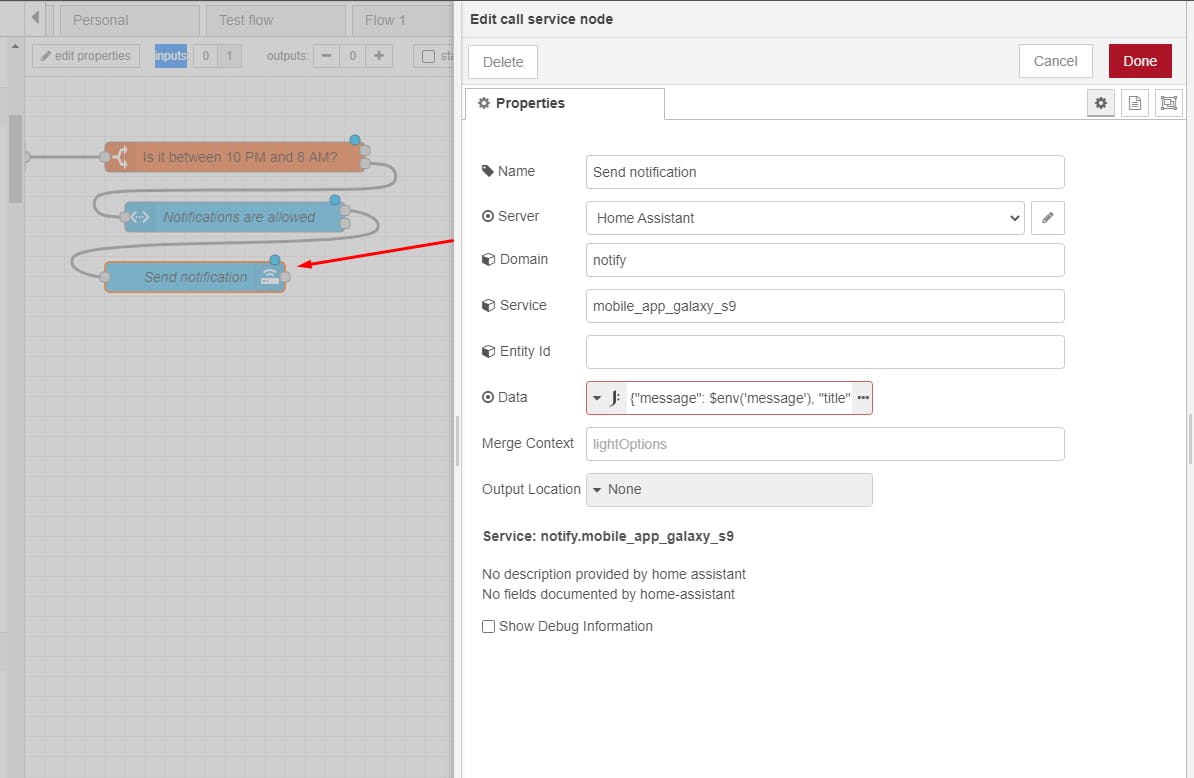
For retrieving the variable values we used JSONata , and this is how the JSON looks like:
{ "message": $env('message'), "title": $env('title') }
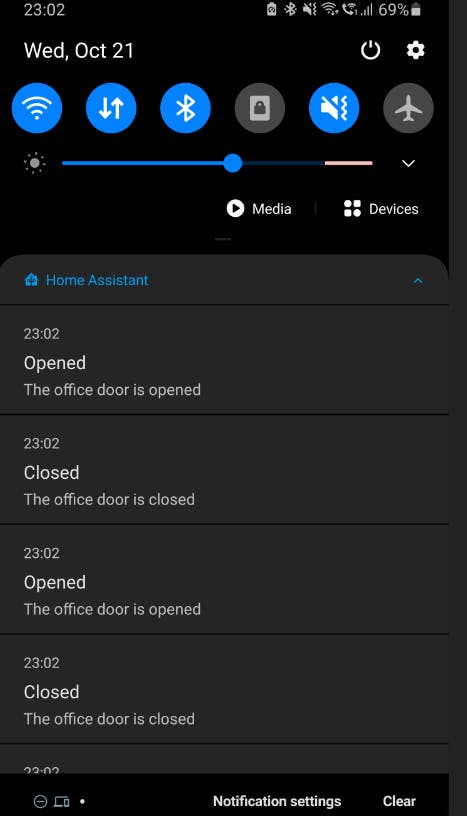
Now you can deploy and test the flow. You should receive a different message according to what you used in the "message" and "title" variable, something similar to the image below:
You can also import this JSON in Node-Red if you're having issues:
Congratulations, you just created your first subflow! The advantages are pretty obvious. Each time you want to send a notification, you won't have to duplicate the initial 3 nodes that we had, instead you'll just use this subflow. And if you need to modify something in the future(like the schedule 10 PM - 8 AM), you have to do it only in the subflow template, not in every usage of the subflow.
What's next?
It's up to you. Now you can create your own nodes as subflows that you can reuse as you see fit. The one I'm most proud is my Alexa subflow.
These are the environment variables it supports:
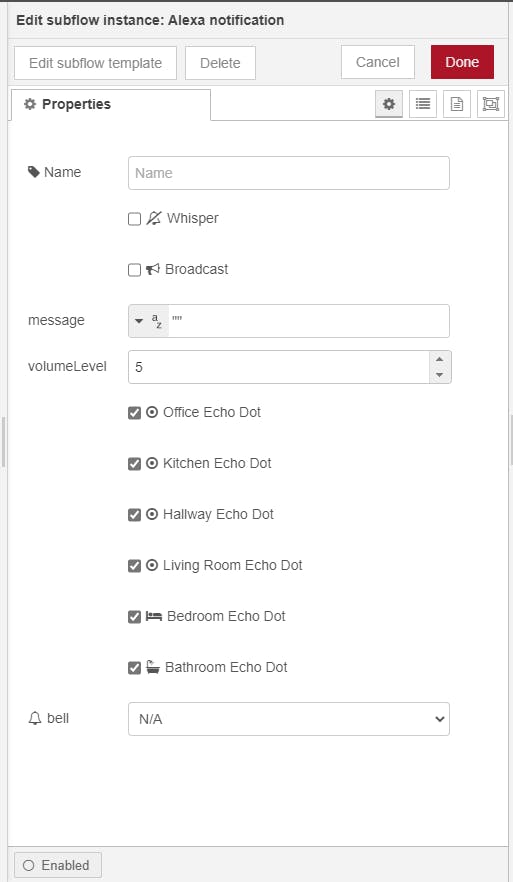
As you can see, it's not only strings, I also have a numeric control for the volume, a dropdown where I can pick a sound instead of a message, and checkboxes that represent all my Echo Dot devices. Here's how it looks inside the subflow:
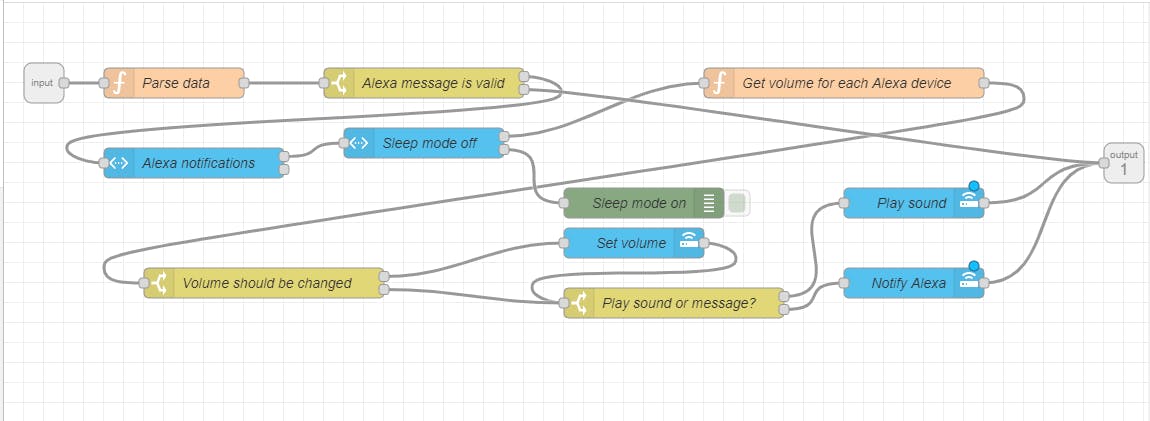
I know it's a bit messy, so I'll try to explain the subflow from the start:
- The entry point will call a function that transforms the data received in a model that can be understood by the Alexa Media Player component, basically it's a JSON with certain properties(message, list of devices to play it on, volume, etc).
- Next, I'll check if the JSON is valid or not
- Then I'll check if an input_boolean called "Alexa notifications" is on. If it's not on, then I'll stop. I actually have a card for Alexa where I can turn settings on or off
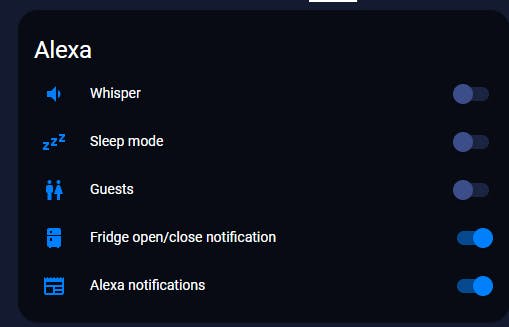 The sleep mode triggers automatically during the night when there's no motion for 5 minutes straight. The "whisper" mode will convert all my messages to whisper instead of loud voice, I usually set this on when my daughter is asleep. And my fridge is not smart, so I used a contact sensor and Alexa to notify me if I left it open more than 1 minute. Let's continue with our flow :)
- If the notifications are allowed, then I'll check if the sleep mode is on, otherwise I won't continue.
- I'll get the volume for each echo dot and see if any of them needs to be changed. I could do this directly but setting the volume takes a few seconds, so in most cases it's not necessary and I'll save time by not calling the set volume function.
- I check if I should play a sound or a message. We can't have both, so that's why I have two different nodes for messages and sounds.
And that's it. I hope you enjoyed this article and you learned enough about subflows so that you can create your own. The next article from the series will be about functions, we'll see how we can access Home Assistant entities and set environment variables with javascript. Until then, you can subscribe to this blog with the form on top and follow me on Twitter !